Watch the Video Here or continue reading below!
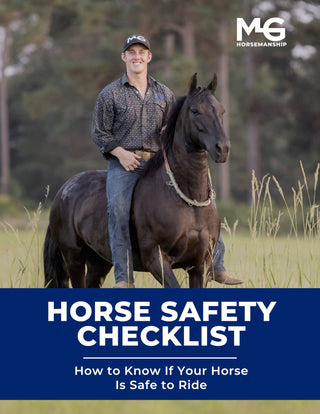
When it comes to gaited horses, proper bitting can make all the difference in developing a smooth, consistent, and confident ride. In this session, equestrian trainer Michael Gascon works with an Icelandic horse named Bert, showcasing how to transition from groundwork to a finished gait using the right bit. Whether you're a gaited horse enthusiast or training a trail partner, this guide offers key insights into the process.
Understanding the Purpose of a Gaited Bit
Not all bits are created equal, especially when it comes to gaited horses. Many riders talk about a "gaited bit," but the real goal is to help the horse move confidently into the bridle, engaging the hind end and elevating the front end for a powerful, balanced movement.
In this demonstration, Mike introduces a solid-bar bit with short shanks—a design he brought back from Spain. Though traditionally used for dressage, its soft, solid mouthpiece and direct-line communication make it ideal for English and gaited horse training alike.
Cavesson or Not? The Debate Explained
One key piece of tack that often raises questions is the cavesson. This small noseband—known as a cavesson in English tack or sometimes a “canvassing” strap—is designed to prevent the horse from gaping its mouth. Western trainers typically avoid cavessons, aiming for a loose rein and minimal contact. In contrast, gaited and English riders often prefer a horse that is "on the bit," maintaining steady contact and collection.
Mike's rule of thumb is simple: if you're looking for softness and ease, skip the cavesson. But when you're working toward engagement, elevation, and a more finished frame, the cavesson can be a helpful tool to support contact and discourage evasions.
Building a Foundation Before Gaiting
Before working on gait, Mike emphasizes the importance of foundational training. Bert had already been through the respect series in a halter and worked in a snaffle. Many riders want to jump straight into gaiting, but as Mike puts it: "Don’t work your horse in a college course if they can’t pass high school."
Foundational elements like mounting, flexing, and moving off softly are essential before introducing a new bit or asking for collection. If a horse is reactive, spooky, or struggles with basic cues, gaiting will only highlight those gaps.
Testing a New Bit: What to Look For
The first step when introducing a new bit is simply to let the horse feel it out. Start by flexing from shoulder to shoulder and asking for soft, vertical flexion—getting the horse to break at the poll and lower its nose. With a solid-bar bit, you won’t get full lateral flexion to the stirrup like with a snaffle, but you will achieve better vertical softness and straightness.
From there, walk off and begin asking for basic turns and stops. Watch how the horse reacts—does he root, resist, or respond softly? Mike recommends keeping your hands low and steady at first, locking your elbows into your side to give the horse a stable point of reference.
The Transition to Gaiting
Once Bert showed comfort with the new bit, Mike moved into gaiting—specifically the tölt, which is the smooth, four-beat lateral gait typical of Icelandic horses. To encourage this, Mike gathered the reins, raised his hands slightly, and used his legs to drive the hind end underneath.
"Collection means respect from the face and respect from the butt," Mike says. You want the horse to lift through the shoulders and engage through the hindquarters, maintaining an even 1-2-3-4 rhythm. The rider’s posture—looking up, sitting up, shoulders back—is just as important. A tight core and balanced seat signal clarity and control.
Circles vs. Straight Lines: When to Use Each
A common training issue in gaited horses is the tendency to gait only in straight lines. Mike breaks that pattern by working Bert in circles to develop a more collected, slow gait. Circles help the horse stay between your hands and legs, improving lateral balance and encouraging evenness in the gait.
For a faster gait, straight lines are more appropriate. But for building consistency, balance, and softness, the circle is your best friend.
Fixing Common Gaiting Mistakes
One issue Bert exhibited was stepping sideways instead of forward at the start of a gait. Mike addressed this by adjusting his rein contact, using the fence line for guidance if needed, and reinforcing forward movement over lateral steps.
Another common issue is unevenness between sides. Most horses have a stiff and a soft side. With a finished bit, this becomes more apparent. The goal is to help the horse realize that when they stay centered—between your hands and legs—there’s no pressure. Consistency comes from balance, and balance comes from even cues.
Why a Finished Bit Matters
The solid-bar bit Mike uses is designed for stability and clarity. With no wiggle or play in the shanks, the horse learns to follow steady pressure and stay between the rider’s aids. A finished bit isn’t just about appearance—it’s about giving the horse a consistent, reliable communication channel.
Comfort also plays a key role. Mike points out that his bit is made of real steel, which oxidizes and encourages salivation. The smooth, rounded mouthpiece with tongue relief is designed to be soft on the mouth, making it easier for the horse to accept and relax into the contact.
Creating a Happy Gaiting Experience
The ultimate goal of bitting a gaited horse is to make the gait the “happy place.” If your horse finds comfort and clarity in your hands, gaiting becomes a place of peace rather than pressure. By using consistent cues, a comfortable bit, and proper body position, you can create a ride your horse enjoys and understands.
Remember: the frame is where your hands are. If the horse stays within that frame, they get to relax and stay comfortable. And that's how you turn a good ride into a great one.