Watch the Video Here or continue reading below
Welcome to the first part of our "Intro to Driving" series, where we will explore the essential steps in transitioning your saddle horse to the driving process. In this lesson, Michael Gascon, the world-renowned horse trainer, will walk us through the early stages of driving, using his horse, Amy, as an example. Amy, a four-year-old warmblood from Vermont, is being introduced to driving for the first time, and we're going to take you through the crucial steps of getting started.
Meet Amy: The Perfect Candidate for Driving Training
Amy is a beautiful four-year-old warmblood who has already undergone colt starting and is now ready to take on the driving process. After an unfortunate incident with a previous trainer, where Amy flipped over backwards and broke her leg, she was sent to Michael for further training. She has since healed and is progressing smoothly through her training, and today marks an important milestone—her first driving session.
The Importance of Colt Starting Before Driving
Before introducing your horse to driving, it's essential that they have gone through colt starting. Colt starting involves basic ground training, such as desensitizing your horse to pressure and ensuring that they are comfortable with being led and guided. This foundational training is key to a smooth transition into driving, as it helps the horse understand the cues and commands needed when pulling a cart or carriage.
Step 1: Long Lining – Setting Up for Success
The first step in teaching your horse to drive is long lining. Long lining is a method of guiding the horse from the ground with two long lines, which are attached to the horse's bridle. This method allows you to communicate with the horse and control their movements from a distance.
Using the Driving Bridle
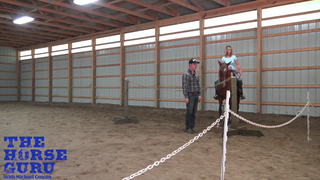
For this session, we are using a driving bridle with a snaffle bit. This setup is gentle on the horse and allows us to communicate with Amy using light pressure. It's important to note that the horse should already be familiar with the concept of long lining before proceeding with driving training. In this video, we demonstrate how long lining is used with Amy, who is blindfolded for the first time as part of her driving introduction.
Proper Setup: Shove Loops for Lower Line Positioning
One important aspect of this session is the positioning of the long lines. Typically, when training for driving, the lines are attached to the shafts of a cart. However, for this first step, we place the lines through the shove loops of the harness. This lowers the lines to a more controlled position. If the horse gets nervous or attempts to turn towards the handler, the lower line position allows the trainer to redirect the horse and maintain control.
Step 2: Ensuring Calmness and Comfort
As we begin long lining Amy, we pay attention to her reaction to the lines touching her body. The lines should gently touch her buttocks, and she should not be startled by this sensation. In this session, Amy is calm and composed, which is a great sign that she's ready for this next step in her training.
Redirecting the Horse's Focus
As we long line Amy, we change directions to help her understand that she must remain focused on moving forward. It is crucial that she doesn't turn towards the handler, especially when the lines are attached to the shove loops. By teaching Amy to go straight and forward, we lay the foundation for successful driving training.
Step 3: Establishing Control of Speed and Direction
At this stage, the goal is to ensure that Amy is responding well to the long lines. She should be able to move forward and maintain a steady pace while following directional cues. If the horse is calm, responds to the lines, and is able to go forward without hesitation, it's a clear sign that you're ready for the next phase of driving training.
Transitioning to the Driving Harness
Today, Amy is wearing a driving harness for the first time, but she is already accustomed to the feel of the saddle and long lines. This makes the transition smoother, as she is familiar with the sensation of pressure and movement on her body. The driving harness is designed to help distribute weight and allow the horse to pull a cart or carriage, and it is important that the horse is comfortable with the harness before progressing further.
Conclusion: Progressing to Step 2
By the end of this session, Amy has successfully completed the first step in her driving training. If your horse has remained calm, responded well to the lines, and demonstrated the ability to control speed and direction, you are ready to move on to the next phase. In the upcoming videos, we will dive deeper into refining these skills and adding more complexity to the driving process.
Thank you for watching! Be sure to check out the next video in this series for further instructions on advancing your horse's driving skills.
Get 30-day horse training for FREE—join the Horse Help Challenge now HERE!


