

Watch the Video Here or continue reading below!
How to teach your horse to stand still, process pressure, and respond more safely when something feels unfamiliar
Congratulations—you have made it to second grade.
In the Horse Help training system, kindergarten and first grade establish personal space, attention, and control of the horse’s head. Second grade is where you begin teaching the horse a new response: stand still when something feels unfamiliar or uncomfortable.
This process is commonly called desensitizing your horse.
Desensitizing is not about making your horse dull, shutting down their natural awareness, or convincing them that nothing will ever be frightening. Horses notice movement, noise, pressure, and changes in their environment. That awareness is part of what makes them horses.
The goal is to shape what your horse does with that awareness.
Instead of running through you, pulling away, or reacting without direction, you want your horse to learn that they can stop, stand, and wait for guidance.
That response can create a calmer, safer, and more dependable partnership.
What Is Horse Desensitization Training?
Desensitizing teaches a response—not the absence of emotion
Horse desensitization training introduces the horse to pressure, movement, sound, and touch in a controlled way.
Your horse may feel unsure when a rope swings over their back, a tarp makes noise, or a flag moves near their body. Feeling unsure does not mean the lesson has failed.
The important question is:
What does your horse do when they feel unsure?
During second-grade desensitizing, the desired response is standing still.
Your horse learns that moving, surging, or spinning does not remove the pressure. Standing quietly creates the release.
That makes the lesson clear:
- Pressure continues while the horse moves.
- Pressure stops when the horse stands still.
- The release shows the horse they found the correct answer.
Timing matters. When the release arrives at the right moment, your horse can begin connecting their response with the result.
Complete First Grade Before Beginning Desensitizing
Control of the head and attention creates a safer foundation
Before starting second grade, your horse should understand the basic lessons from first grade.
You should be able to:
- Keep your horse outside your personal space
- Direct the horse’s head
- Move the horse around you
- Redirect the shoulders when necessary
- Maintain control if the horse becomes worried
- Regain the horse’s attention
This foundation matters because a frightened horse may try to leave, pull the lead rope away, or move into the handler’s space.
If you cannot control the horse’s head before introducing an unfamiliar object, it will be more difficult to guide the horse safely when they react.
Second grade builds on first grade. It does not replace it.
When the foundation feels uncertain, return to the earlier lesson and strengthen it before adding more pressure.
Your Body Language Changes the Meaning of the Rope
The same tool can ask for movement or teach stillness
The lead rope is used during earlier groundwork to ask the horse to move. In second grade, that same rope is used during desensitizing.
How does the horse know the difference?
Your body language.
When asking your horse to move, your posture may become more assertive. You stand upright, direct your focus toward the horse, and use clear energy to influence the feet.
When desensitizing, your body should look different.
Relax your shoulders. Soften your posture. Avoid staring intensely at the horse. Swing the rope with a calm, matter-of-fact rhythm.
You are showing the horse that the movement of the rope does not automatically mean, “Move your feet.”
This is part of learning the horse’s nonverbal language. Your posture, focus, position, and energy all contribute to the meaning of the cue.
Begin Desensitizing With Distance
Start with the lead rope before moving closer with other objects
Second-grade desensitizing begins with an object you already have: the lead rope.
Starting with distance gives you room to observe the horse’s response while remaining in a safer position.
Begin by swinging the rope through the air near your horse without touching them.
Keep your posture relaxed.
When your horse can stand while the rope moves nearby, begin making light contact.
A helpful progression is:
- Swing the rope through the air.
- Touch the horse near the withers and back.
- Move the rope toward the hindquarters.
- Introduce movement near the flanks.
- Work carefully around the front and hind legs.
- Repeat the process on the opposite side.
The area across the withers and back is often a practical place to begin because many horses are more comfortable being touched there than around the legs or flanks.
Do not rush directly to the most sensitive area.
Build the lesson in clear, manageable steps.
Use the Lead Rope for Cinch Preparation
Gentle pressure around the barrel prepares the horse for future equipment
The lead rope can also be used for cinch preparation.
Double the rope and place it around the horse’s barrel where a cinch or girth would sit. Apply light, steady pressure while maintaining control of the lead.
Your horse may step forward, move sideways, or become concerned about the pressure around their body.
Stay with the horse without jerking, chasing, or escalating emotionally.
When the horse stands still, release the pressure.
This helps prepare the horse for:
- A cinch tightening around the barrel
- Pressure beneath the belly
- Equipment moving near the sides
- Touch around the flanks
- Saddle preparation
Begin with the least amount of pressure that allows the horse to notice the lesson. Add only what is necessary.
You are not trying to overpower the horse.
You are helping them discover the response that makes the pressure disappear.
Release Only When the Horse Finds the Answer
Clear timing prevents accidental lessons
The most important principle in this exercise is simple:
Do not remove the pressure because the horse moves. Remove it because the horse stands still.
Imagine that you touch your horse’s hind leg with the rope and they step away. If you immediately remove the rope, the horse may learn:
“When I move, the pressure disappears.”
The next time something touches that area, the horse may move sooner or react more strongly because movement worked before.
Instead, calmly continue the same pressure while staying with the horse. The moment the feet stop, remove the pressure.
That immediate contrast helps the horse understand the lesson.
Pressure does not need to become harsh. It needs to remain consistent enough for the horse to search for a different response.
When the horse stands, become quiet.
That quiet moment is the reward.
Stay in a Safer Working Position
Spacing and positioning help protect both horse and handler
Your position matters during every desensitizing exercise.
Avoid standing directly in front of the horse while tossing the rope over the body. If the horse jumps forward, they could move into your space.
Instead, work from the side near the shoulder while maintaining control of the head.
This position can help you:
- Stay out of the horse’s direct forward path
- Redirect the head if the horse tries to leave
- Move with the horse without being pulled
- Keep the horse’s body from swinging toward you
- Maintain space around your own feet and body
Always watch the shoulders, head, hindquarters, and feet.
No position around a horse removes all risk. Work within your ability, use appropriate equipment, and seek experienced, in-person help when a horse has a history of striking, kicking, bolting, or aggressive behavior.
Double the Rope for Easier Handling
A heavier section of rope can be simpler to swing accurately
When working with the lead rope, doubling it can make the section in your hand heavier and easier to swing.
An overhand motion can also help you move smoothly from one side of the horse to the other.
The goal is controlled, repeatable movement—not hitting the horse with unnecessary force.
A clear rhythm makes it easier for the horse to understand that the rope will continue moving until they stand.
Practice your rope handling away from the horse first when needed. You should be able to control where the rope lands before swinging it around sensitive areas.
Repeat Every Exercise on Both Sides
Understanding on one side does not guarantee understanding on the other
Horses may respond differently depending on which eye sees an object and which side of the body feels the pressure.
A horse that accepts the rope on the left may still become worried when you repeat the same lesson on the right.
That is why everything should be practiced on both sides.
Work through the same basic progression:
- Introduce the object near the muzzle
- Move toward the neck and shoulder
- Touch the back and barrel
- Work toward the flank
- Introduce movement around the legs
- Release when the horse stands
The second side may progress more quickly because the horse has already begun understanding the pattern.
Do not assume, though. Give the horse a fair opportunity to process each side.
Progress to the Flag Stick
The flag adds sight, sound, and movement while preserving distance
Once your horse can stand while you work with the lead rope, move to the flag stick.
A flag stick allows you to create movement and sound from a distance. That makes it a helpful next step between the rope and more hands-on tools such as a tarp.
Begin by introducing the flag near the muzzle.
The muzzle is how the horse naturally investigates unfamiliar objects. Presenting the flag there gives the horse an opportunity to see and examine it before you begin moving it across the body.
From the muzzle, progress toward:
- The neck
- The shoulder
- The withers and back
- The hindquarters
- The flanks
- Beneath the belly
- Around the legs
Move in an organized pattern rather than waving the flag randomly.
Your horse should be able to understand where the pressure is coming from and what response creates the release.
Keep the Flag on Your Side of the Horse
Correct placement gives the horse room to move away from you
Stay on the same side of the horse as the flag stick.
If you stand on one side while moving the flag on the other, the horse may turn away from the flag and bring their body toward you.
That can place you in a dangerous position.
Keep the horse’s face directed generally toward you and leave open space on the opposite side. If the horse needs to move, you want them moving into that open area rather than into your bubble.
When crossing the flag above the horse’s back, bring it back to your side promptly.
The goal is to introduce the horse to movement in different areas without losing control of their direction.
Work Through the Horse’s Visual Quadrants
Desensitizing should include left, right, above, and below
Horse owners often hear that horses process information differently on the left and right sides.
Second-grade desensitizing considers more than those two sides.
Think about four visual areas:
- Left
- Right
- Above
- Below
A horse may be comfortable with a flag moving near the shoulder but become worried when it appears above the back or below the belly.
This becomes especially important when preparing a horse for a rider.
A rider occupies space above the horse and may move through areas the horse does not see clearly. If those areas have not been introduced thoughtfully, an otherwise familiar horse may react when movement suddenly appears near a blind spot.
Work gradually through all four quadrants.
Return the flag to your side if the horse becomes worried, maintain the movement, and release when the horse stands.
Introduce the Flag Above the Chest Line
Safe presentation reduces the chance of inviting a strike
When first presenting the flag near the muzzle, bring it toward the horse from above the chest line rather than low near the front legs.
A low object approaching the horse’s front can invite pawing or striking in some horses.
Keep an appropriate distance, maintain control of the head, and be prepared to move with the horse if they step backward or sideways.
If the horse moves, continue calmly.
When the horse stops, remove the flag and allow a quiet moment.
That release tells the horse that standing—not running backward—completed the lesson.
Do Not Freeze When Your Horse Reacts
Your calm persistence helps teach the horse to stop and wait
When a horse jumps, spins, or surges, many handlers instinctively freeze.
That reaction can interrupt the lesson or cause the pressure to disappear at the wrong moment.
Try to remain calm and continue moving with the horse while maintaining safe positioning.
The response you are trying to build is:
- “When I am unsure, I can stop.”
- “When I feel pressure, I can wait.”
- “When I do not know what to do, I can look for direction.”
Fear itself is not the only concern.
The horse’s reaction to fear is what often creates danger.
A horse that learns to pause and wait for instruction can become safer and easier to guide through unfamiliar situations.
Advance to Tarp Desensitizing
The tarp works with sight, sound, and touch
After the horse accepts the lead rope and flag stick, move to a tarp.
A lightweight tarp is useful because it combines three important parts of desensitizing:
- Sight
- Sound
- Touch
It moves in unusual ways, creates noise, and feels different against the horse’s body.
Begin at the muzzle, just as you did with the flag.
Then progress to the neck, shoulder, withers, back, barrel, hindquarters, and legs.
Rub the tarp across the horse as though you were gently washing or drying them. Allow it to wrinkle and make noise without deliberately trying to frighten the horse.
As the horse becomes more comfortable, you can place part of the tarp across the back or drape it like a loose cape while maintaining control.
A tarp measuring approximately six by eight feet can be manageable for many introductory exercises. Choose one that is lightweight, easy to release, and free from sharp edges, cords, or hardware.
Never wrap or tie the tarp in a way that could trap the horse.
Prepare Your Horse for Real Life
The arena should prepare your horse for more than an ideal environment
Desensitizing should help your horse handle the kinds of pressure they may experience in everyday life.
That may include:
- A jacket moving in the wind
- A rope touching the legs
- Saddle straps shifting
- Trail debris making noise
- A rider moving above the back
- Bags, flags, or unfamiliar objects
- Equipment contacting the flanks
- Sudden sounds nearby
The goal is not to expose your horse to every possible object.
It is to teach a dependable response to uncertainty.
When something new appears, your horse has a familiar pattern:
Notice it.
Stay connected.
Stand still.
Wait for direction.
That pattern is more valuable than memorizing one specific tarp, flag, or rope.
Use a Lightweight Ball as a Final Test
Movement across the back helps reveal how the horse handles unusual pressure
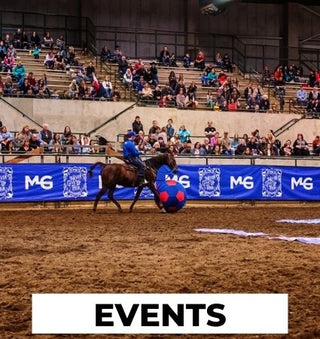
The final tool in this second-grade progression is a lightweight ball.
Introduce it to the muzzle first, and then place or roll it carefully across the horse’s back.
The ball may move differently from the rope, flag, or tarp. It can help you observe the horse’s natural response when an unfamiliar object shifts across their body.
Some horses may try to:
- Kick
- Bite
- Strike
- Spin
- Rush forward
- Move away
These reactions provide information.
They do not automatically mean the horse is bad. They show you the defensive response the horse may choose when they feel pressure.
Your job is to notice the pattern, maintain safe control, and continue teaching the horse that standing quietly produces the release.
Make the Saddle the Least Frightening Thing on the Horse’s Back
Thoughtful preparation helps prevent the saddle from becoming a major event
Rope, flag, tarp, and ball exercises can all support future saddle preparation.
By the time the saddle is introduced, the horse has already experienced:
- Movement over the back
- Pressure around the barrel
- Contact near the flanks
- Noise above and beside the body
- Objects appearing in different visual areas
- A repeated pattern of standing for release
A saddle is heavier and more difficult for the handler to move with than a rope or tarp.
That is why lightweight tools can help you identify and work through concerns before placing a saddle on the horse.
The saddle should feel like another understandable step—not the most frightening thing the horse has ever experienced.
How Long Should Second-Grade Desensitizing Take?
Move on when the horse passes—not when the clock says the lesson is over
Every horse progresses at a different pace.
One horse may accept the rope within two minutes. Another may need several shorter sessions before standing consistently.
Do not keep repeating an exercise simply because you planned to spend a certain amount of time on it.
When the horse passes one test, move to the next appropriate step.
At the same time, do not rush forward because you are impatient.
Passing means the horse can stand and remain manageable while the object is introduced on both sides and around the relevant areas of the body.
The horse does not need to look completely uninterested.
They do need to understand the expected response.
Common Desensitizing Mistakes
Small timing and positioning errors can teach the opposite lesson
Releasing when the horse moves
Removing the object during movement can teach the horse that moving away makes pressure disappear.
Continue calmly until the feet stop, then release.
Starting too close
Begin with distance using the rope or flag before moving to hands-on tools.
Distance gives you more room to observe and respond.
Ignoring body language
Relaxed shoulders and neutral focus help distinguish desensitizing from a cue to move.
Standing in the horse’s path
Avoid working directly in front of the horse or positioning yourself where the body may swing into you.
Working only one side
Repeat each exercise on the left and right, as well as above and below when appropriate.
Increasing pressure too quickly
Give the horse time to process each step before moving to a louder, closer, or more challenging object.
Continuing after a clear success
When the horse gives the correct answer, release.
Do not keep adding pressure until the horse feels they can never succeed.
The Three Main Lessons of Second Grade
Distance, timing, and complete preparation create a clearer experience
The second-grade desensitizing process can be summarized in three principles.
1. Continue until the horse stands still
When the horse moves, maintain the same fair pressure while staying safely positioned.
Release the moment the horse stops.
2. Begin with distance
Start with the lead rope, progress to the flag stick, and then use closer tools such as the tarp and ball.
Allow your horse to build understanding step by step.
3. Prepare the whole horse
Work on both sides and through the horse’s visual quadrants.
Include sight, sound, and touch so your horse develops a more complete response to unfamiliar pressure.
Desensitizing Helps Build a More Trusting Partnership
Your horse learns that you will provide direction when life feels uncertain
Good desensitizing is not about forcing a horse to tolerate frightening experiences.
It is about giving the horse a clear answer.
When your horse is unsure, they do not have to run, pull away, or move through you. They can stand, wait, and look for your guidance.
Each time you apply pressure fairly and release at the correct moment, the conversation becomes clearer.
Your horse begins to understand what you are asking.
You become more confident in your ability to guide them.
And together, you build a safer, more respectful partnership—one clear lesson at a time.
Frequently Asked Questions About Desensitizing a Horse
What does desensitizing a horse mean?
Desensitizing introduces a horse to unfamiliar movement, sound, pressure, and touch while teaching a safer response. The goal is not to remove all awareness. It is to teach the horse to stand, remain manageable, and wait for guidance.
What should I use to desensitize my horse?
The Horse Help second-grade progression uses a lead rope, flag stick, lightweight tarp, and ball. Begin with the tool that provides the most distance, and gradually move to closer contact.
Should I stop when my horse moves away?
Maintain calm, consistent pressure while moving safely with the horse. Release when the horse stands still. Stopping because the horse moved may accidentally reward the movement.
How do I know when my horse has passed the exercise?
The horse has passed when they can stand while the object moves nearby or touches the appropriate areas of the body. Practice on both sides before moving to the next step.
Will desensitizing make my horse dull?
Desensitizing should not make a horse unresponsive when it is taught with clear body language and fair pressure and release. Your horse learns that relaxed movement around them means stand, while an assertive cue still means move.
Why should I desensitize both sides of my horse?
Horses may respond differently depending on which side sees or feels an object. Repeating the lesson on both sides helps create a more complete and dependable understanding.
Is desensitizing safe for beginners?
Some introductory exercises may be appropriate for beginners with a quiet horse, safe equipment, and experienced supervision. Horses that bolt, strike, kick, bite, or pull away should be handled with qualified in-person guidance.